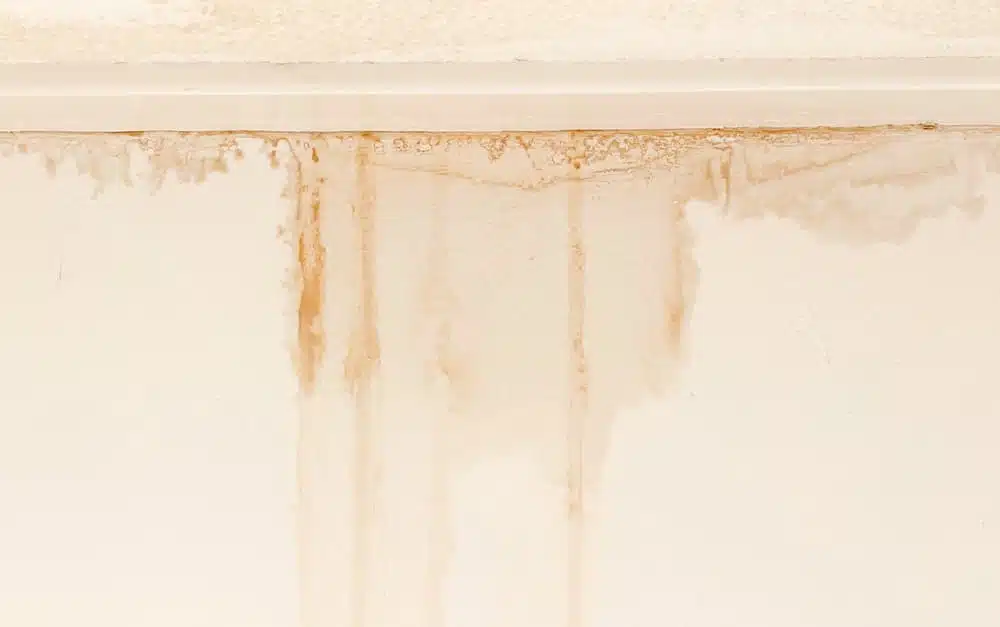
If you’re noticing stains on your ceiling or walls, it could indicate a potential leak in your roof or condensation in the attic. Either way, it’s important to have any issues properly inspected and fixed before they can develop into something more serious and costly. Read on to learn more about condensation and how to fix a leaking roof.
Contents
Signs of Condensation
Condensation is commonly found on window panes, but it can also occur in the attic, causing stains along the ceiling and walls. When there’s moisture in the air and it comes into contact with a cold surface, condensation forms. It can be caused by poor insulation and air leaks.
But how can you determine whether there’s an actual roof leak or just condensation? The key factor is usually the origin of the moisture. This allows you to know if you need to fix a leaking roof, or just have condensation. If there are watermarks around areas that aren’t unusual, such as the bathroom, near a window or skylight in the ceiling, then it is likely a result of condensation. Let’s take a look at some things to look for when trying to learn how to fix a leaking roof.
Signs of a Leak
Alternatively, when water stains occur in more random areas, such as spots on the ceiling directly under the roof and away from moisture-prone areas, this could indicate a leak in the roof. Luckily our team at Roofmaster knows how to fix a leaking roof and is happy to help!
How to Fix a Leaking Roof
To make sure there aren’t any serious problems festering, get your roof inspected. We always recommend hiring a roofing professional to perform a safe and thorough inspection so they can catch any potential problems early. We will check your attic and look closely for any signs of cracks or air leaks. We will keep an eye out for the sun poking through or any damp sections.
If your roof is in fact leaking, we can perform the necessary repairs needed to prevent the issue from escalating. Although, it’s important to learn how to fix a leaking roof. Most of the time, it’s best to leave the repairs to the experts!
Tools and Materials Used to Fix a Roof Leak
As the first line of defence against any type of weather, your roof is made up of several layers that protect the inside of your home. These layers use high-quality materials to help seal things in, and keep moisture out. When they become damaged or punctured, we come equipped with various items needed to complete this type of repair. These materials vary depending on the severity of the leak, but most often include:
- Shingles that match your current roof’s colour and existing materials
- Roofing paper or synthetic underlayment
- Roofing nails and 8d common nails
- Roofing cement or exterior sealant
Additionally, we will bring a roof vent if that is the cause of your leak, or exterior grade plywood if the leak is caused by a weak point in your roof deck. In either case, we bring a variety of tools to help us fix the damaged area and install the new materials to ensure your leak doesn’t come back. These tools can include:
- Flat pry bar
- Hammer
- Hook blade shingle cutter
- Utility knife
- Ladder
- Flashlight
- Caulking gun
- Chalk line
- Circular saw
- Tape measure
- Pencil
Locating the Roof Leak
Once we arrive at your home, we will get to work identifying where your leak is coming from. Generally, we start at the lowest point of the roof where water can pool. We’ll also check along the roof vents for any cracks. We’ll be able to identify the area easily, as it will likely be stained and may contain mould or mildew.
Removing the Damage
Our team will start to remove any damaged piece by piece. However, this process will depend on where the leak is coming from.
If the roof vent is the cause, we will first remove the nails holding it against the roof deck. Pulling back any shingles or roof paper as needed, we will expose the area to understand the extent of the issue better.
In the event the leak is coming from your roof deck, our team will pull off two rows of shingles starting from the effected area and mark the spot on wood that needs to be removed. We’ll carefully cut it out, ensuring that we work between shafts so as not to damage any structural beams underneath.
Fixing the Problem
Leaks caused by a damaged roof vent will likely need some kind of sealing or flashing to ensure the leak does not continue. After it has been applied, the new roof vent can be nailed into place.
For a roof deck repair, a plywood patch is needed to replace the area that was cut out. Once in place, it can be covered with roofing paper and reshingled, starting from the bottom up. Shingles will be leafed together to ensure a seamless look and seal.
After your roof has been properly repaired, your leak will be gone, and your shingles or roof vent will look good as new.
Even though condensation isn’t always something to worry about, any form of moisture around the roof can cause problems in the future if it’s not repaired correctly. Please get in touch if you have more questions about how to fix a leaking roof. If you’re in Ottawa and need your roof inspected or repaired, contact us at Roofmaster today!